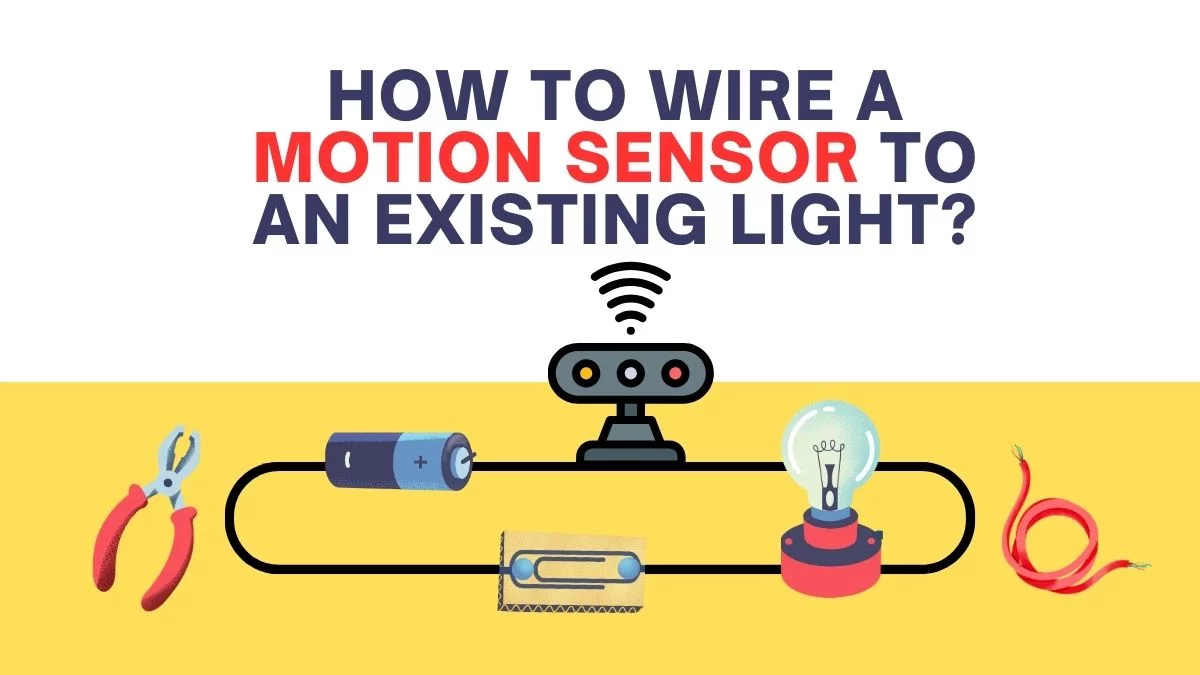
Navigating the world of DIY home improvements can feel like deciphering an ancient script. Why does something as seemingly simple as connecting a motion sensor to an existing light feel like rocket science?
Think about the last time you fumbled in the dark, searching for a switch. Wouldn’t it be transformative to have a light that intuitively responds to your presence?
Why stay in the dark when the solution is within reach? Let’s embark on this enlightening journey together, turning confusion into clarity and your home into a beacon of modern convenience.
Why Add a Motion Sensor to Your Existing Lighting?
The Convenience of Automated Lighting
Let’s face it, we’ve all had those moments where we’re carrying a load of groceries or juggling a toddler and a bag of laundry, and the last thing we want to do is fumble for a light switch.
What if the light could just know you’re there? That’s the magic of adding a motion sensor to your existing lighting. It’s like having a personal assistant who’s always on duty, flipping the switch the moment you enter the room.
Hands-Free Experience in Daily Life
Think about the rooms you frequent the most—your kitchen, bathroom, or garage.
Now, consider how much easier life would be if you didn’t have to touch a single switch in those spaces. According to a study by Lutron Electronics, automated lighting can save an average of 10 minutes per day for homeowners.
That adds up to about 60 hours a year! Time you could spend doing things you love, rather than mundane tasks.
Energy Efficiency and Cost Savings
Now, let’s talk numbers. How much juice does a light bulb really sip? Well, it’s not just about one bulb; it’s about all the lights, in all the rooms, all year long. According to the U.S. Department of Energy, lighting accounts for about 15% of the total energy usage in an average American home (source). Doesn’t sound like much? Consider this: that 15% translates to around $150 to $300 per year on your energy bill.
How Motion Sensors Reduce Electricity Waste
Here’s where motion sensors come into play. By ensuring that lights are only on when needed, you can cut down on that 5% significantly. A study by the Environmental Protection Agency (EPA) found that motion sensor lighting can reduce electricity usage by up to 30%. That’s a potential saving of $150 to $400 per year, just by making your lighting smarter.
So, why wouldn’t you want to make the switch? It’s like putting your lights on a diet and your wallet on a growth plan. And let’s not forget the environmental impact.
Reducing your energy consumption means less carbon footprint. It’s a win-win situation for you and Mother Earth.
Preparing for Installation of Motion Sensor To An Existing Light
Tools You’ll Need: Your Trusty Companions in This Adventure
Alright, folks, let’s get down to brass tacks. You wouldn’t go on a camping trip without a tent, right? Similarly, you can’t embark on this electrifying journey without your toolkit. So, what are the essentials?
- Motion Sensor: The star of the show. Make sure it’s compatible with your existing light setup. (For this guide, I have chosen ZigBee motion sensors, however you can use any motion sensor of your choice.)
- Screwdriver: Your trusty wand for all things twisty and turny.
- Wire Cutters: Because sometimes, you’ve got to cut ties to make new connections.
- Wire Connectors: The matchmakers of the electrical world.
- Voltage Tester: The guardian angel that ensures you’re not stepping into a live-wire situation.
- Electrical Tapes: For marking wires and sealing connections.
- Junction Box: The stage where all your wires will dance together.
Why this ensemble of tools? Each plays a unique role, like instruments in an orchestra, coming together to create a symphony of light and motion.
Safety First: The Non-Negotiable Prequel to Your Installation Saga
Okay, let’s get serious for a moment. What’s the one rule that’s as fundamental as the law of gravity in the world of DIY? Safety. Yes, you heard it right. Safety isn’t just a word; it’s a mantra you should chant throughout this process.
The Electrical Breaker: Your Safety Net
Before you even think about touching a wire, march yourself to the electrical breaker and turn off the power to the area you’ll be working in. Why is this step so crucial? Well, think of electricity like a river. A river can power a mill, but it can also sweep you off your feet if you’re not careful.
Turning off the electrical breaker is like building a dam; it stops the flow, making it safe for you to navigate the electrical landscape.
The Voltage Tester: Double-Check, Because It’s Better to Be Safe Than Sorry
Even after you’ve turned off the breaker, use your voltage tester to confirm that the wires are not live. It’s like double-checking your parachute before skydiving; you can never be too cautious.
Guide to Wire a Motion Sensor to an Existing Light (Step-by-Step Installation)
Step #1. Installing the Junction Boxes: The Foundation of Your Project
First things first, let’s talk about the junction boxes. These are the hubs where all your wires will meet and interact, much like a busy intersection in a city.
So where should these junction boxes go? One should be close to your existing light, and the other should be situated near the spot where you plan to install your motion sensor.
Why two, you ask?
One box will house the motion sensor’s wiring, and the other will be for your LED light.
How to Wire the Junction Boxes
Wiring a junction box is like setting up a mini electrical panel. You’ll have a lead wire coming from your main electrical box—that’s your power source.
Then you’ll have a jumper wire that will go from your motion sensor to your LED light.
Connect these wires in the junction box, ensuring they’re tightly secured with wire connectors.
Step #2. Mounting the LED Light Bracket: Securing Your Light Source
Now, let’s move on to the LED light bracket. This is the skeletal structure that will hold your LED light in place. Think of it as the spine of a book, holding all the pages together.
To mount the bracket, first attach it to the junction box you’ve designated for your LED light. Most brackets come with screws, so you’ll need that trusty screwdriver.
Once the bracket is secure, don’t forget to connect the ground wire to the grounding nut on the bracket. Grounding is like the seatbelt in a car—it’s a safety feature you shouldn’t ignore.
Step #3. Wiring the Motion Sensor: The Heart of the Operation
Ah, the moment we’ve all been waiting for—wiring the motion sensor. This is where the magic happens. The motion sensor is like the brain of this operation, telling the light when to turn on and off.
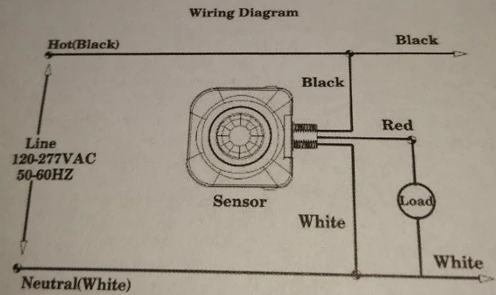
Step #4. Connecting the Hot Wire
First up is the hot wire, often black or red. This wire is like the gas pedal in a car; it gets things moving.
Connect the hot wire from your junction box to the brown wire on your motion sensor. Use a wire connector to secure this connection.
Step #5. Wiring the Neutral and Ground
Next, let’s talk about the neutral and ground wires. If the hot wire is the gas pedal, then the neutral wire is the brake. It completes the circuit, allowing electricity to flow back safely.
Connect the neutral wire from your junction box to the blue wire on your motion sensor. Don’t forget to include a white neutral jumper wire in this connection.
The ground wire, usually green or bare, is your safety net. It prevents electrical shocks in case of a fault. Connect this to the grounding nut on your LED light bracket.
Step #6. Completing the Circuit: The Final Act
Finally, you’ll need to connect the load wire, which is usually red, from your motion sensor to the black wire that leads to your LED light. This completes the circuit, allowing electricity to flow to the LED light when the motion sensor detects movement.
Testing and Adjustments After Installing
Testing the Motion Sensor and Light: The Moment of Truth
So you’ve wired everything up, and it’s time for the grand reveal. But before you celebrate, let’s make sure everything works as it should. Turn the electrical breaker back on and cautiously approach the area where the motion sensor is installed. If the light turns on, give yourself a pat on the back—you’ve done it! If not, double-check your wiring and connections. It’s like baking; sometimes you have to make sure you didn’t forget any ingredients.
Fine-Tuning Sensor Settings: The Art of Customization
Great, your motion sensor and light are working. But are they working optimally for your needs? Most motion sensors come with adjustable settings that you can fine-tune.
Sensitivity Settings
Too many false alarms from pets or passing cars? Adjust the sensitivity settings. Lower sensitivity means the sensor will only react to larger movements—like humans walking by.
Timer Settings
Want the light to stay on for just a brief moment or a little longer? Tweak the timer settings. You can usually set it to turn off after intervals like 10 seconds, 1 minute, or even 5 minutes.
Lux Settings
If you prefer the light to activate only when it’s dark, play around with the Lux settings. This controls how much ambient light will trigger the sensor.
And there you go! With a bit of testing and fine-tuning, you’ve not only installed a motion sensor but also customized it to fit your lifestyle. It’s like tailoring a suit; it’s good off the rack, but perfect when it’s customized to you.
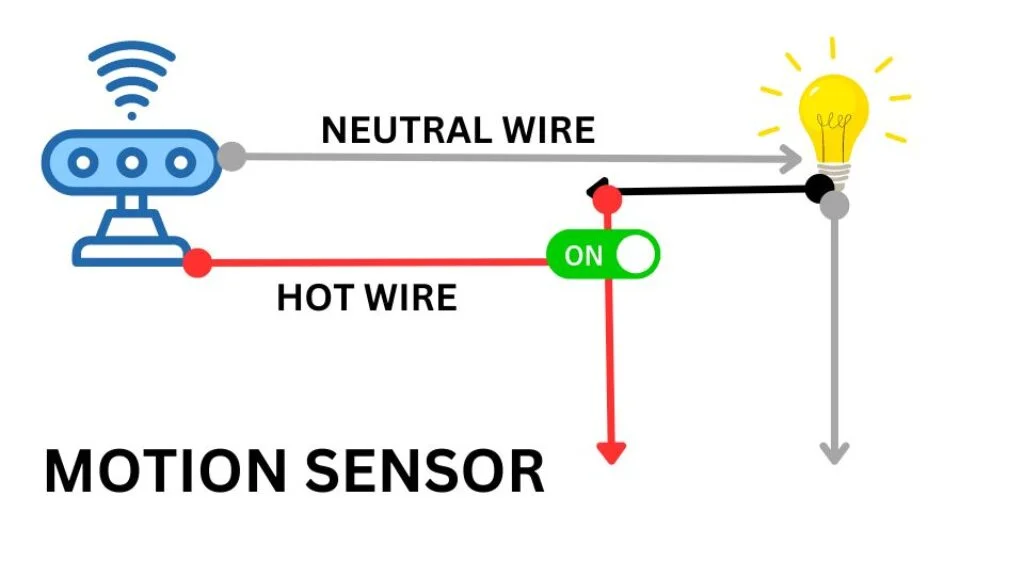
How to Wire a Motion Sensor Light Without a Switch: A Direct Approach
Wiring a motion sensor light without a switch means you’ll be connecting the sensor directly to the power source, bypassing the need for a manual on/off switch.
This setup is ideal for areas where you always want the light to activate when motion is detected, like in a dark basement or a backyard. (learn more about smart home lighting ideas)
Wire Configurations: The Blueprint
Here’s a general guide on how to wire a motion sensor light directly to a power source. Note that wire colors may vary, so always refer to the manufacturer’s instructions for your specific motion sensor and light fixture.
Wires from the Power Source
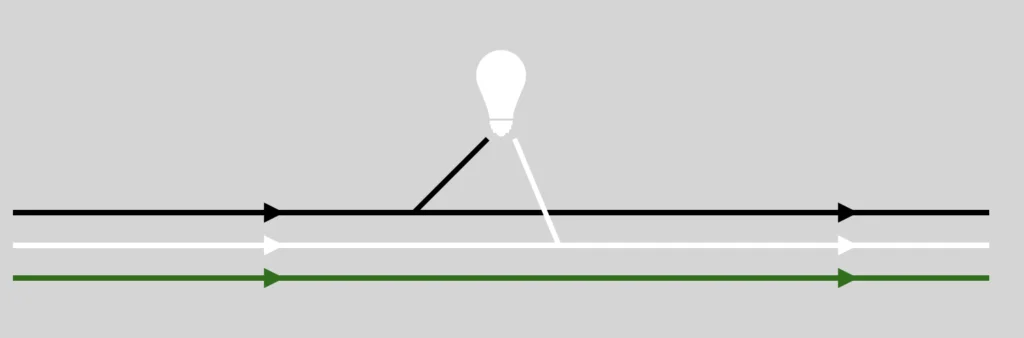
- Black Wire (Hot): This is the live wire that supplies electricity.
- White Wire (Neutral): This wire completes the electrical circuit.
- Green/Bare Copper Wire (Ground): This is your safety wire.
Wires from the Motion Sensor
- Red Wire (Load): This wire sends electricity to the light.
- Black Wire (Hot): This wire connects to the hot wire from the power source.
- White Wire (Neutral): This wire connects to the neutral wire from the power source.
- Green/Bare Copper Wire (Ground): This wire connects to the ground wire from the power source.
Wires from the Light Fixture
- Black Wire (Hot): This wire receives electricity to turn on the light.
- White Wire (Neutral): This wire completes the circuit.
- Green/Bare Copper Wire (Ground): This is your safety wire.
Step-by-Step Wire Connections
- Connect the Hot Wires: Connect the black wire from the power source to the black wire from the motion sensor using a wire connector.
- Wire the Load and Light: Connect the red wire from the motion sensor to the black wire from the light fixture using a wire connector.
- Neutral Wires: Connect the white wire from the power source, the white wire from the motion sensor, and the white wire from the light fixture together using a wire connector.
- Grounding: Connect all the green or bare copper wires from the power source, motion sensor, and light fixture together using a wire connector.
- Secure All Connections: Make sure all wire connectors are tightly secured. You can also use electrical tape for added safety.
- Test: Turn the power back on at the electrical breaker and test the motion sensor and light to ensure they are working as expected.
Frequently Asked Questions
Can I install a motion sensor to an existing light?
Yes, you can add a motion sensor to an existing light by wiring it between the power source and the light fixture. Make sure to turn off the electrical breaker before starting.
Can any light be connected to a sensor?
Most standard LED, incandescent, and fluorescent lights can be connected to a motion sensor. However, always check the sensor’s compatibility specifications to be sure.
Can I add a sensor to an outdoor light?
Yes, you can add a motion sensor to an outdoor light. Ensure the sensor is rated for outdoor use to withstand weather conditions.
Do you need a special switch for a motion sensor light?
No, a special switch is not required for a motion sensor light. The sensor itself acts as an automatic switch, turning the light on and off based on motion detection. Although, you can use Smart Switch for advance configurations.